Flutter Widget - SafeArea

SafeArea[1] 是用于适配不规则尺寸设备的一个 Widget,如 iPhone X 这类设备
我们就在默认 Flutter 项目 - 计数器,在 iPhone Xs 基础上测试 SafeArea
这是未修改前的布局代码部分:
@override
Widget build(BuildContext context) {
  return Scaffold(
    appBar: AppBar(
      title: Text(widget.title),
    ),
    body: Center(
      child: Column(
        mainAxisAlignment: MainAxisAlignment.center,
        children: <Widget>[
          Text(
            'You have pushed the button this many times:',
          ),
          Text(
            '$_counter',
            style: Theme.of(context).textTheme.display1,
          ),
        ],
      ),
    ),
    floatingActionButton: FloatingActionButton(
      onPressed: _incrementCounter,
      tooltip: 'Increment',
      child: Icon(Icons.add),
    ),
  );
}
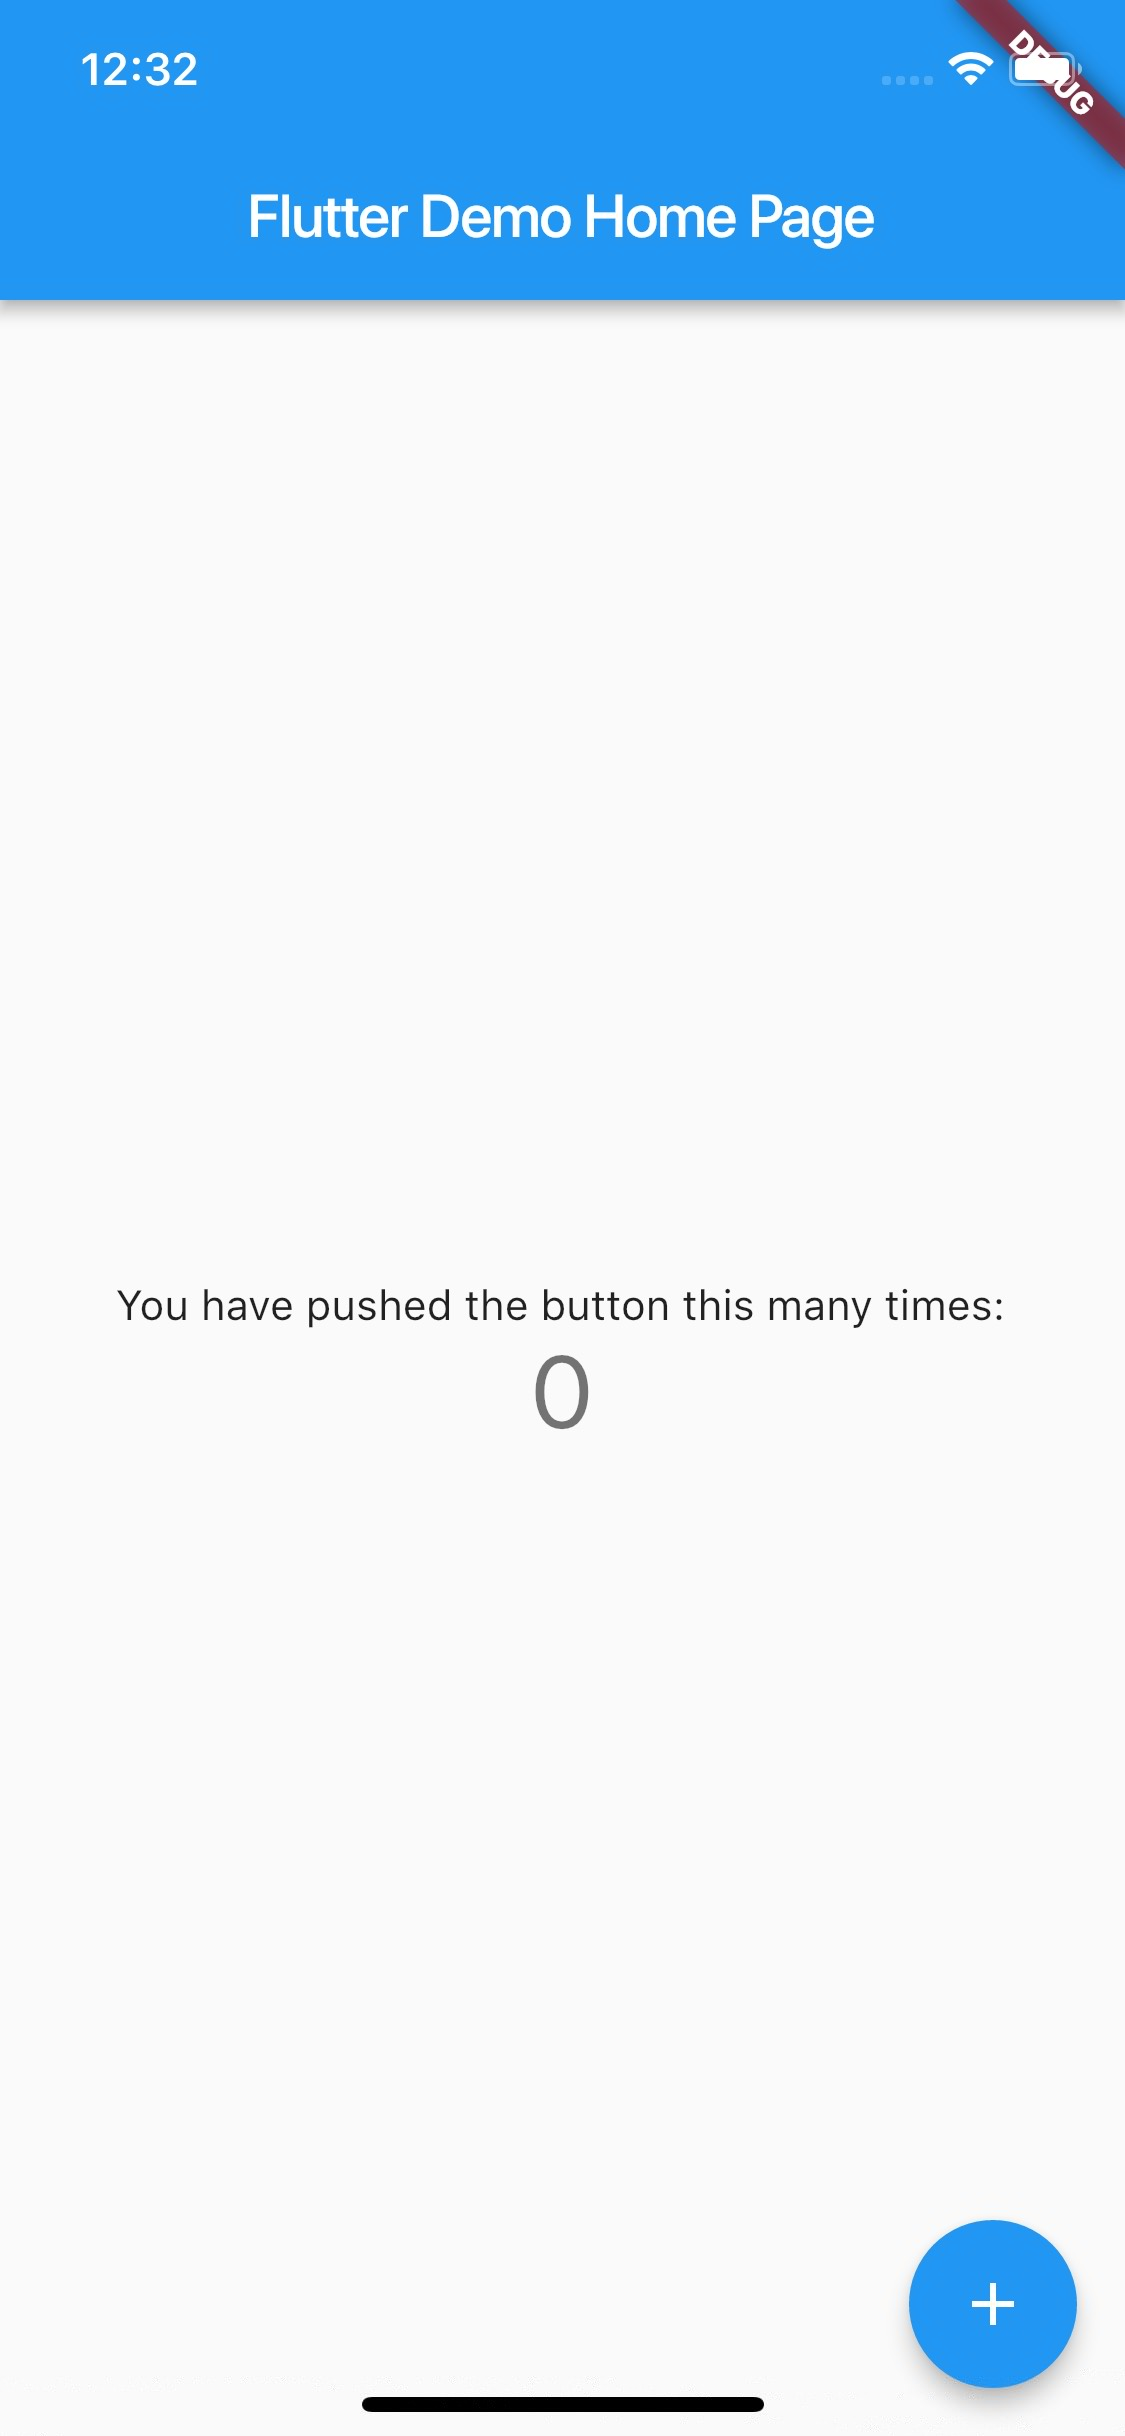
目前的界面是这样的:

我们接下来做一些修改,使中间的文字部分移至屏幕的最下方,我们把中间的 Column 的 mainAxisAlignment 属性设置为 MainAxisAlignment.end 即可实现此效果,代码修改如下:
@override
Widget build(BuildContext context) {
  return Scaffold(
    appBar: AppBar(
      title: Text(widget.title),
    ),
    body: Center(
      child: Column(
        mainAxisAlignment: MainAxisAlignment.end,
        children: <Widget>[
          Text(
            'You have pushed the button this many times:',
          ),
          Text(
            '$_counter',
            style: Theme.of(context).textTheme.display1,
          ),
        ],
      ),
    ),
    floatingActionButton: FloatingActionButton(
      onPressed: _incrementCounter,
      tooltip: 'Increment',
      child: Icon(Icons.add),
    ),
  );
}
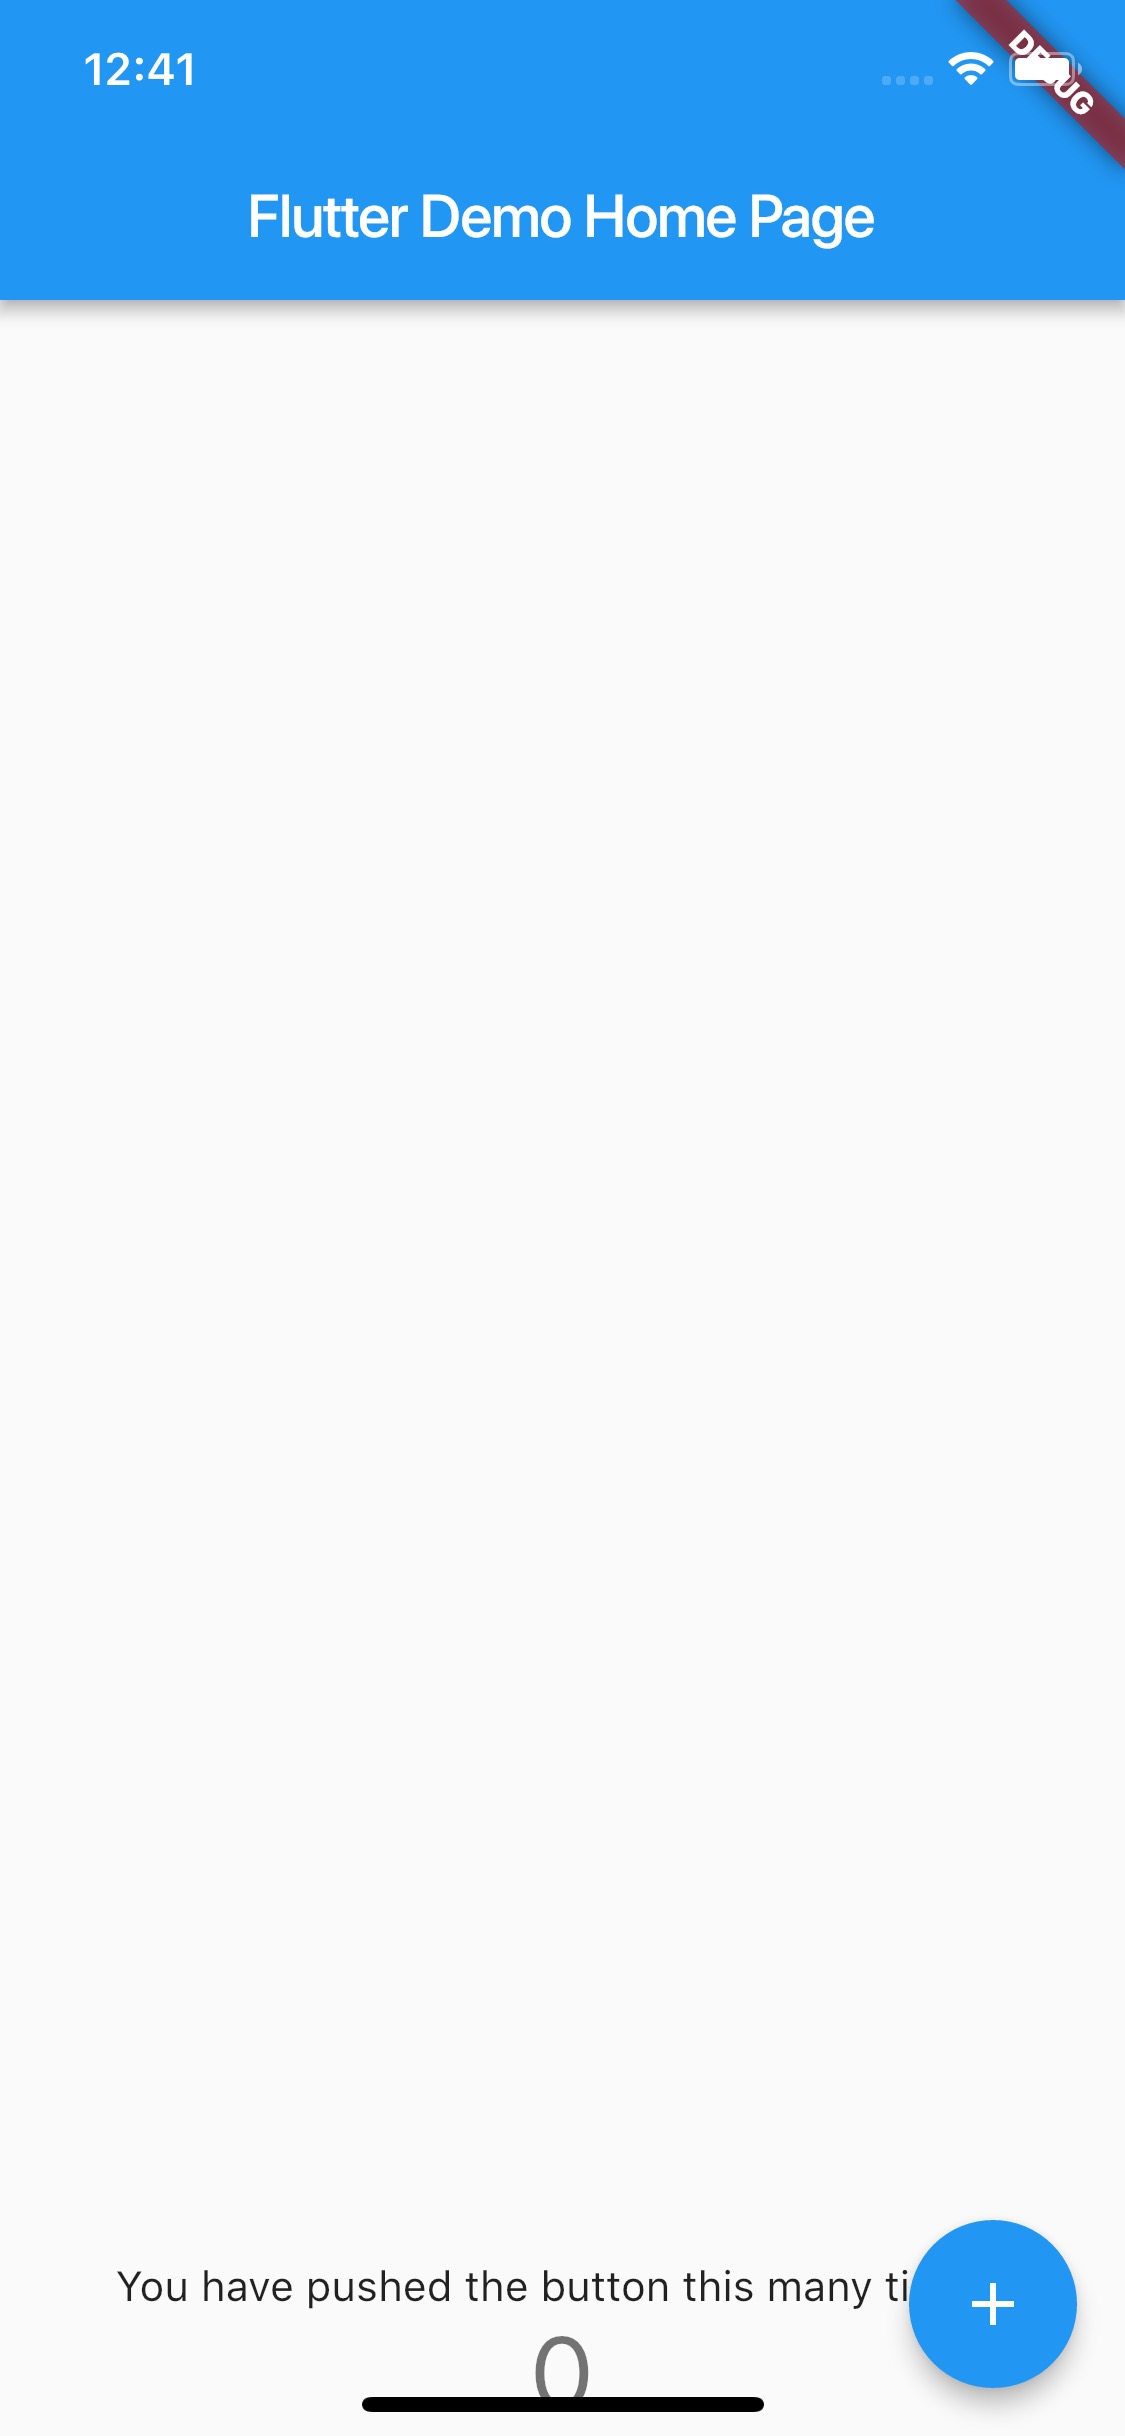
这个时候界面上就可以看出来文字被 iPhone Xs 底部操作指示器遮挡了一些:

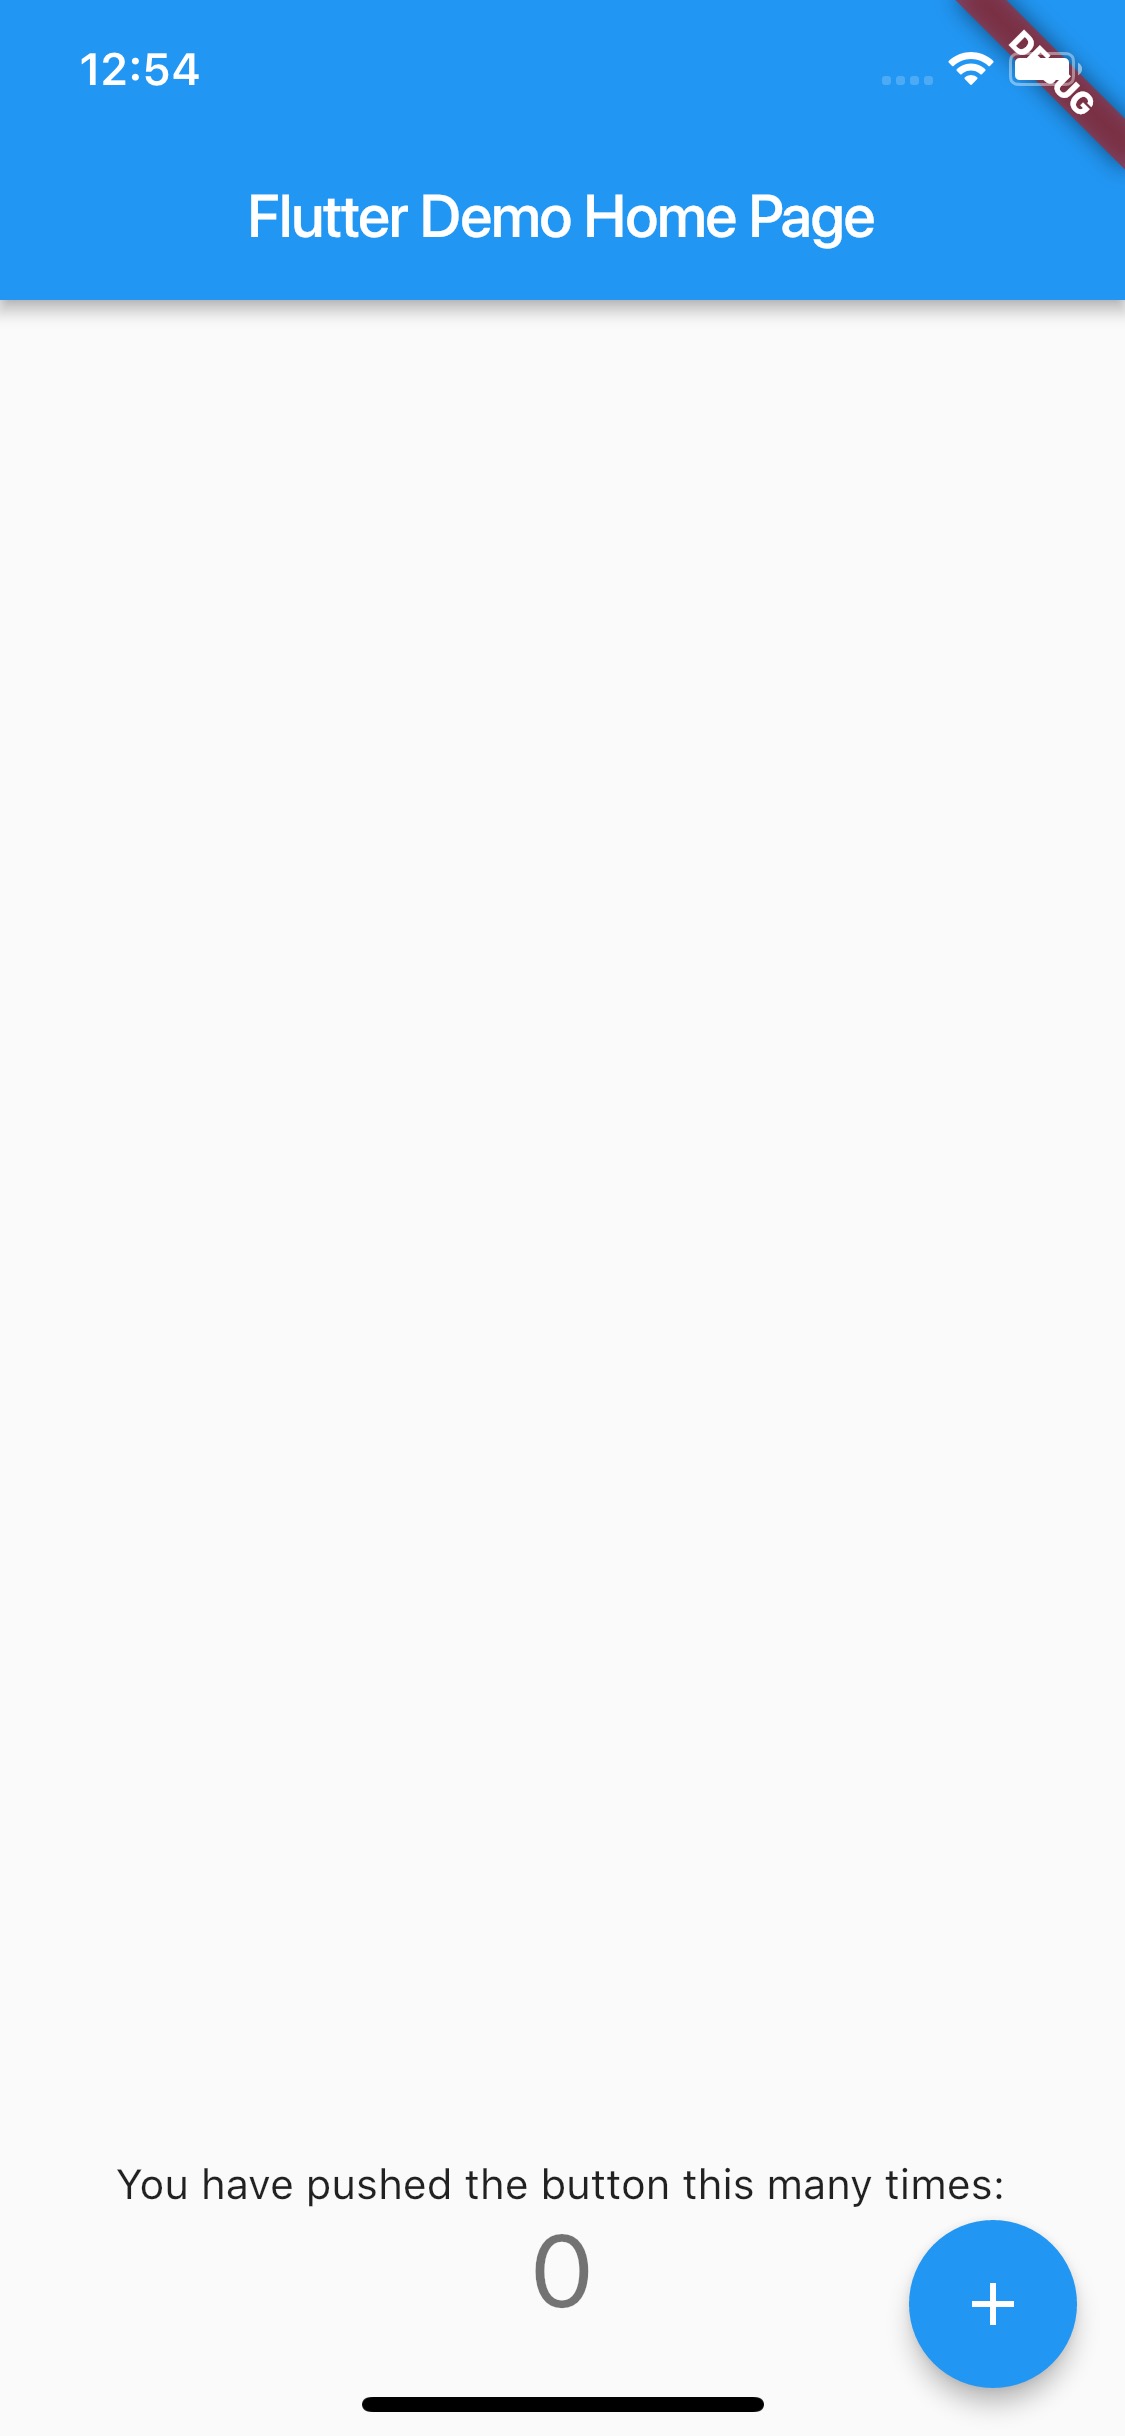
这个时候我们便可以使用 SafeArea 来避免这样的情况了,而且使用非常简单,仅仅只需用 SafeArea 包裹住 Center 即可,代码如下:
@override
Widget build(BuildContext context) {
  return Scaffold(
    appBar: AppBar(
      title: Text(widget.title),
    ),
    body: SafeArea(
      child: Center(
        child: Column(
          mainAxisAlignment: MainAxisAlignment.end,
          children: <Widget>[
            Text(
              'You have pushed the button this many times:',
            ),
            Text(
              '$_counter',
              style: Theme.of(context).textTheme.display1,
            ),
          ],
        ),
      ),
    ),
    floatingActionButton: FloatingActionButton(
      onPressed: _incrementCounter,
      tooltip: 'Increment',
      child: Icon(Icons.add),
    ),
  );
}
然后再次观察界面,就会发现界面自动进行了安全显示区域的适配,非常方便:

